Flying safely when ice builds on the airframe is challenging enough when everything is working right. Here are a few tricks for when it doesn’t.
If there’s one system that breeds overconfidence in the neophyte, it’s ice protection gear. Ice in the forecast? You’ve got that known-ice Turbo Bugsmasher tucked away in a hangar just for such occasions. Problem solved, right? Not so fast.
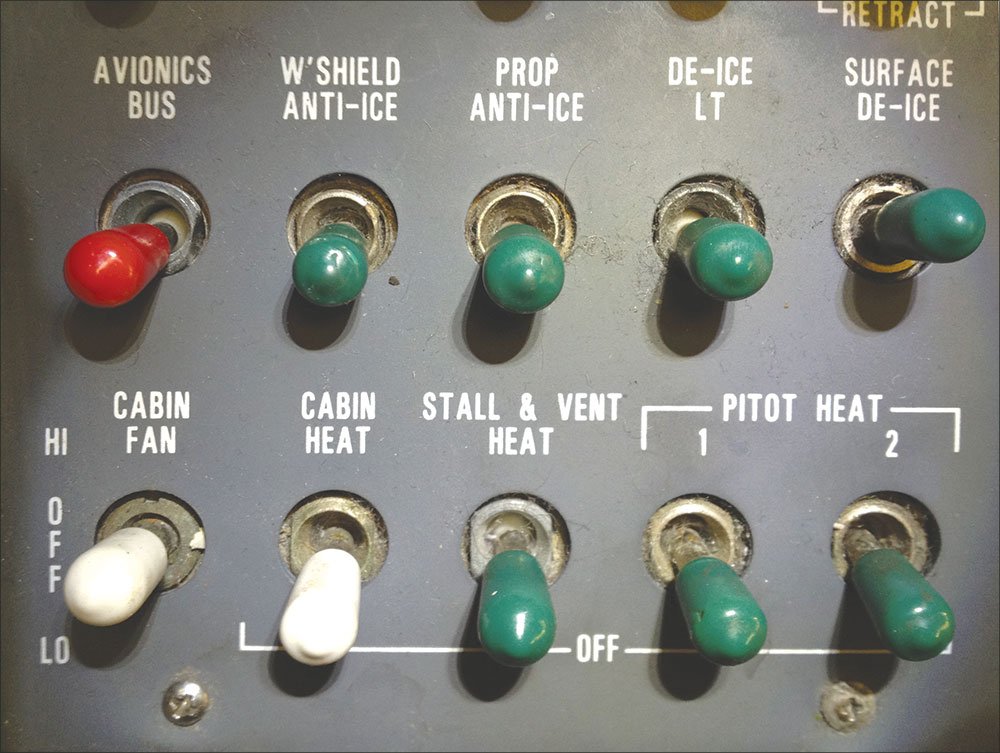
Smart ice flying starts with a solid understanding of your aircraft’s ice equipment and its limitations. There are a lot of new switches, so for each system know how to determine that it’s working correctly before flying, when and how it should be used, how to tell when it isn’t working correctly in flight, and then what to do about it. Too often, this is only given a cursory review in transition training.
Probes
It seems like every aircraft more complex than a Piper Cub has a heated pitot tube, and it’s frequently the only switch in training aircraft that is still original equipment because it never gets used. When it comes to ice flying, however, it’s certainly as important as the fancier protection systems.
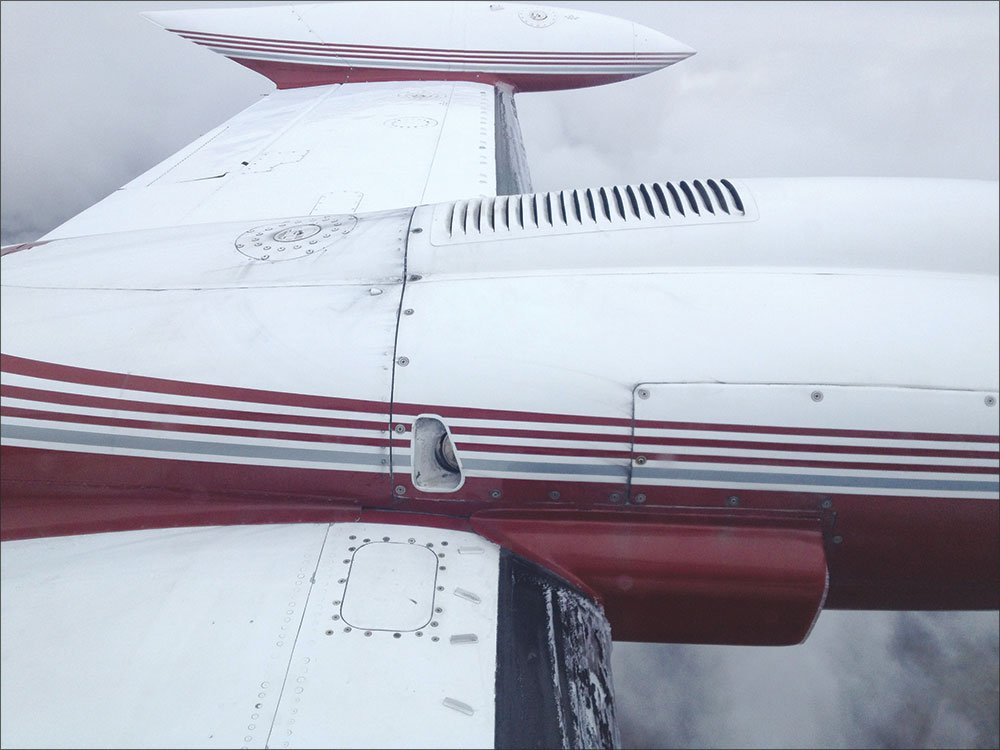
Pitot tubes, stall vanes, and fuel vents are all small, thin pieces of metal stuck out in the wind, so they also act as ice magnets. An iced-up pitot tube or fuel vent can easily ruin a pilot’s day, so they should be heated prior to icing up.
The process that many air carriers adopt is to simply turn them on prior to takeoff and not give them a second thought because you lose nothing by doing so. Although at low altitude in the summertime you’re not going to encounter ice, a recurring theme in professional flying is correct habit formation. This way you won’t have to change your habits when it starts getting cold again.
You can test these on the ground for warmth before flight, but batteries are weaker than normal and engines starts fussier when it’s cold. I prefer to save the battery load and check them after engine start by turning each system on individually and watching the ammeter rise each time.
Propellers
Look at any ice-flying twin and you’ll see battle wounds from ice slung against the nose (most have reinforced skin in that area). Passengers may not like hearing what sounds like the aircraft being occasionally smacked with a hammer, but it is a convenient alarm that you’ve entered icing conditions.
Propeller blades are lifting bodies just like wings, and narrow, so they’re particularly susceptible to icing up and losing efficiency. Therefore propeller heat should be turned on prior to entering potential icing conditions.
Heating elements attached to each blade are the most common system for protecting propellers, although alcohol systems exist. Each blade has one or two heating elements under the rubber boot, which varies by aircraft type and propeller manufacturer. These heating elements are controlled by a timer, which provides current to each heating element in sequence.
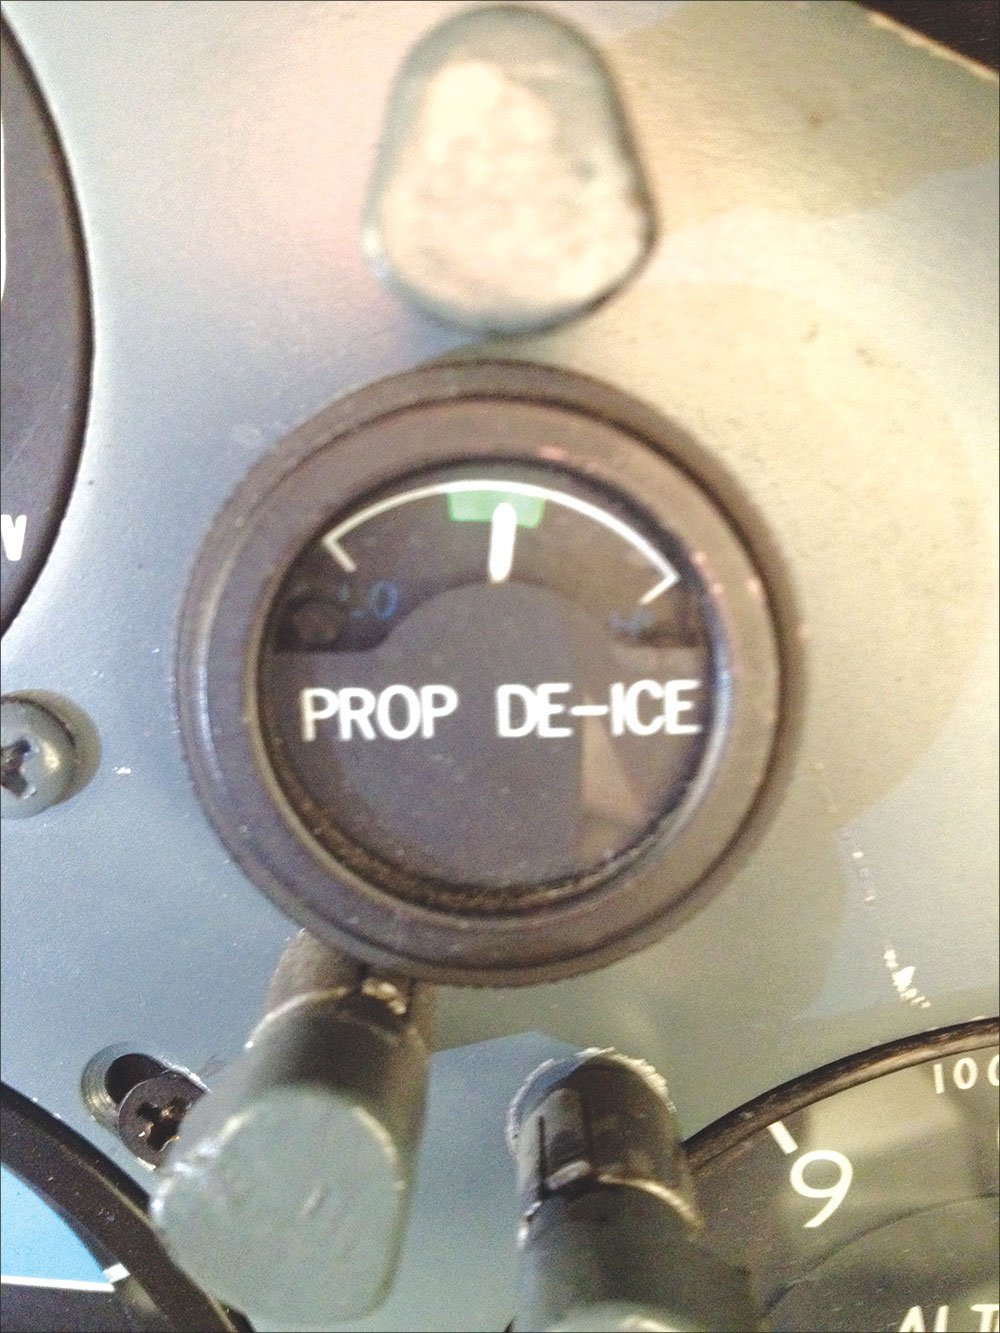
The propeller heat should not be turned on with the engines off or they may be damaged. After engine start, turn the system on and monitor the propeller ammeter. It should indicate within the allowable range for the duration of the entire sequence, which depends on how many cycles the timer goes through and how long each cycle lasts. You should learn this for each aircraft you plan to fly into icing conditions. Once the cycle is complete, turn the system off.
A failure of the heating element or wiring will cause the propeller ammeter to show low or zero amps at one point in the sequence. I’ve even seen the adhesive fail on the boot itself, slinging the whole boot against the airplane, causing a tremendous bang (and dent), but that’s rare. The blade with the faulty element will not readily shed ice, causing the propeller to become imbalanced if the propeller heat is left on in icing conditions.
A short somewhere in the system will cause the circuit breaker to trip and disable the entire propeller heat system. Just for fun, the short may only occur when the system is wet—such as flying in precipitation when you need it most. This leaves the propeller(s) without protection, leading to loss of propeller efficiency and a slight imbalance, but not as severe as with just one failed element.
In both cases, vibration associated with an imbalanced propeller is hard to miss. It’s also important to remedy it quickly to avoid engine or mount damage (and perhaps lost fillings). In a pinch, an imbalanced propeller can be temporarily improved by varying the propeller RPM to cause the blades to move and hopefully sling off a good chunk of ice.
Some propeller heat installations also have a manual mode that bypasses the timer and causes each element to be heated simultaneously.
This saved the day for me in a Caravan when the engine began to vibrate badly even with a properly functioning automatic propeller heat. I had to periodically hold the manual heat to shed enough ice to stop the vibration until I could climb out of the icing conditions. This mode is handy in an emergency or in a situation where the propeller heat timer has failed. But you’re drawing more current to heat everything at once, so watch your main ammeter.
Windshield
Windshield protection comes in two flavors: electrothermal and alcohol. Electrothermal systems include heated windshields and hotplates and should be activated prior to encountering icing conditions. Alcohol systems are primarily used to remove ice that has accumulated when you need to see outside. The alcohol can be as hard to see through as ice, so plan to turn it off a minute or two before landing.
For alcohol windshield deicing, make sure you know where the tank is located, and that it’s full prior to flight. Turn the system on to ensure the pump is working and will spray. It can take quite a bit of time (20 seconds or so) for the fluid to reach the windshield, depending on the tank’s location, so don’t give up too soon.
Electrothermal systems are checked after engine start by briefly turning the switch on and looking for a large ammeter draw, an annunciator to light (if present), and the magnetic compass to show a significant error. Remember that there will be an error when reading the compass with the windshield protection activated. An automatically slaving HSI should not be affected because the slaving compass is usually located remotely to keep it away from the big electromagnetic field in the windshield.
It’s important to leave electrothermal systems off on the ground except for your brief preflight check. The heating elements are air-cooled in flight, so running a heated windshield or hotplate on the ground for an extended period of time can cause the windshield to craze or warp (expensive!). Likewise, don’t wait until the windshield is iced over to turn on the windshield protection. It won’t work as well and, ironically, the ice will prevent the heating element from being properly cooled, allowing it to damage the windshield.
All varieties of windshield protection aren’t great, but they let you see enough to land. Most of the time, an iced-over windshield will improve by encountering warmer air at lower altitudes or by friction slowly taking its toll once accretion stops. Encountering significant icing on approach seems to be fairly rare, but is certainly eye opening when landing with roughly one square foot (hotplate) or a couple-inch-tall strip (heated windshield) of clear windshield.
Should the windshield protection fail in icing conditions, being unable to spot traffic will be the least of your worries. If the temperature is below freezing at the surface, you’re in for quite a challenge if you can’t see the runway! In a pinch, the defroster can provide some degree of forward visibility. If your aircraft has more than one defrost vent (as many twins do), the copilot’s defrost vent can be blocked with a coat or rag to pump even more heated airflow out of the pilot’s vent.
Surface
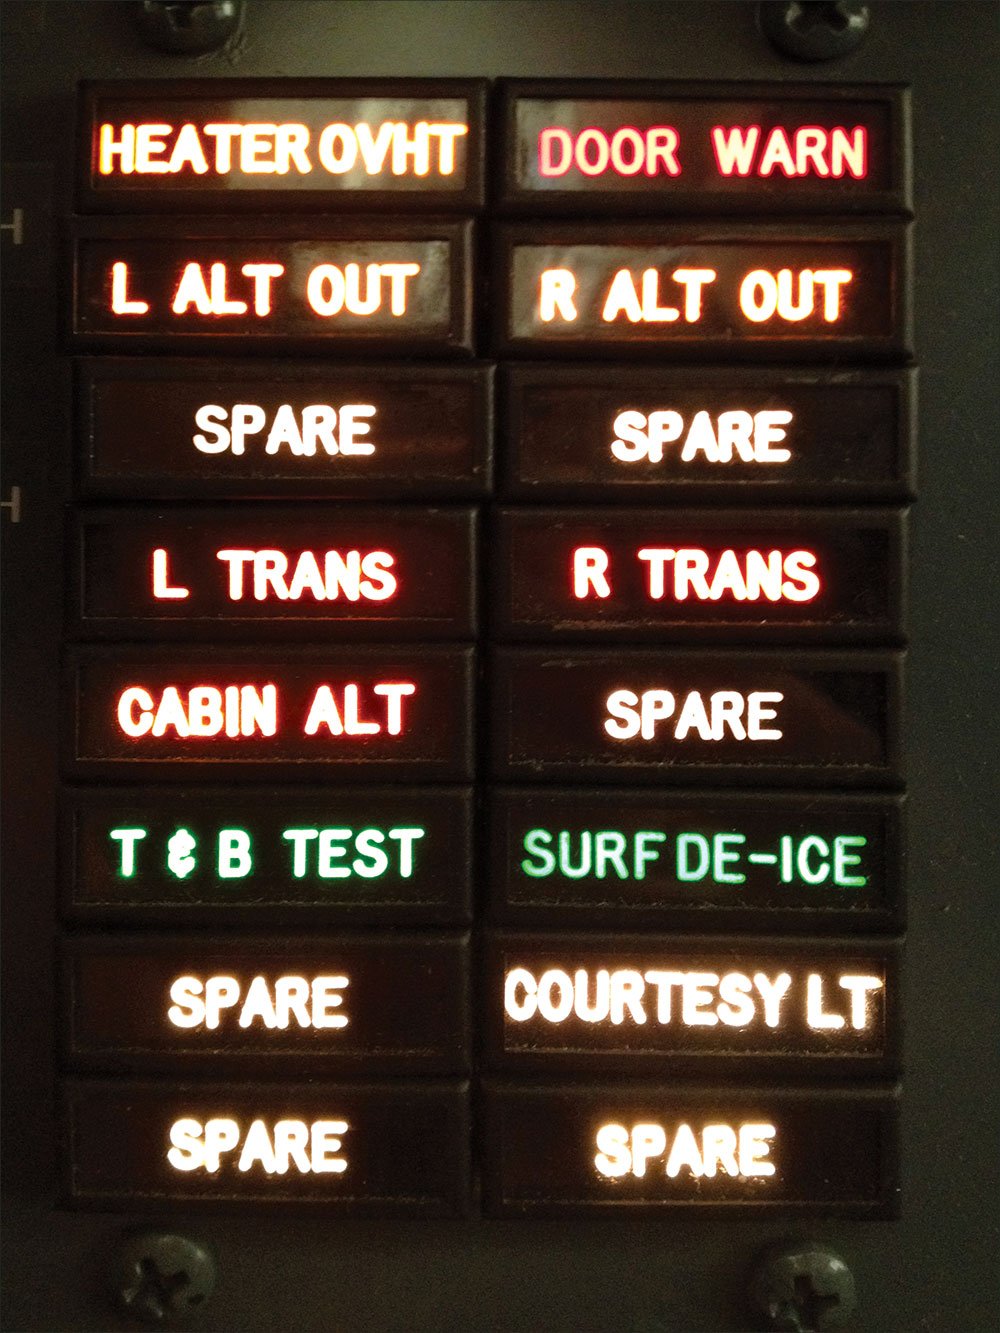
Pneumatic rubber boots are usually the first thing that comes to mind when pilots think of ice equipment. They are a complex system with several electrical and pressure components providing plenty of points of failure, but without giving much feedback to the pilot. You can’t visually judge whether the boots are inflating to the proper pressure, which is why there is a surface deice annunciator.
The annunciator is attached to one or more pressure switches, which activate to indicate a specific portion of the system has reached operating pressure. Every aircraft handles this a bit differently, so know the specifics for your aircraft. No light (with a functioning bulb) means loss of pressure somewhere in the system and a corresponding loss of ice-shedding ability.
Pressure is usually lost through holes in the boots, which can easily be patched, but the flow valves that control pressure to the individual boots may leak as well, and often aren’t changed until they fail.
Examine the condition of each boot and look for small tears that could allow pressure to leak. The surface should be smooth; any roughness is indicative of dry rot and a greater chance of developing holes and tears as the rubber deteriorates, so keep an eye on it. Activate the system during your run-up and visually verify proper inflation and deflation of as many boots as you can see, as well as the annunciator lighting the correct number of times.
Should the boots fail to deflate, ice may build up on the inflated boots, making it impossible to remove further accumulation if it isn’t quickly addressed. Thankfully there is a simple solution: Pull the surface-deice circuit breaker. This removes current from the flow valves, causing them to return to their normal position. In this case, you can continue to use the surface deice system by manually cycling the circuit breaker.
However, when you click the surface deice switch and nothing happens to Margaritaville spreading over the wing, it’s probably going to be a bad day. If it’s just the control module failing to cycle, some aircraft have a manual position that bypasses the control module and inflates all the boots simultaneously—possibly at the expense of suction or pressure for your cockpit instruments. This allows you to use the system. Just don’t hold the switch longer than it takes for the boots to fully inflate.
Unfortunately, many complete failure scenarios, such as a malfunctioning valve dumping pressure or even a bad On switch, can’t be fixed in flight. This is why a preflight functional check of such a complex system is essential.
The Right Balance
Ice flying isn’t particularly difficult, but it’s easy to paint yourself into a corner when you don’t know any better. I was lucky. My first taste of real ice flying was in my freight-flying days, and only after completing company training on practical ice flying and the relevant aircraft systems. Many pilots aren’t so fortunate.
If you’re in that group, find a mentor pilot experienced with your type (or a similar type) to fly with for a while when winter comes, even if you’ve already completed any insurance-mandated training. Accident reports are peppered with pilots who thought they were invincible with rubber leading edges. On the other hand, many capable aircraft stay on the ground only because pilots are too apprehensive to exercise their capability in real ice.
The trick is to find the middle ground, and that starts with a complete understanding of the relevant systems for the aircraft you’ll be flying.
WEATHERING THE WET-WING WOES
TKS systems don’t have as many moving parts, but they still have failure modes. The most common items are blocked or dry panels, pump failures and simply running out of fluid. Unfortunately, there’s little you can do in flight to fix any of these things.
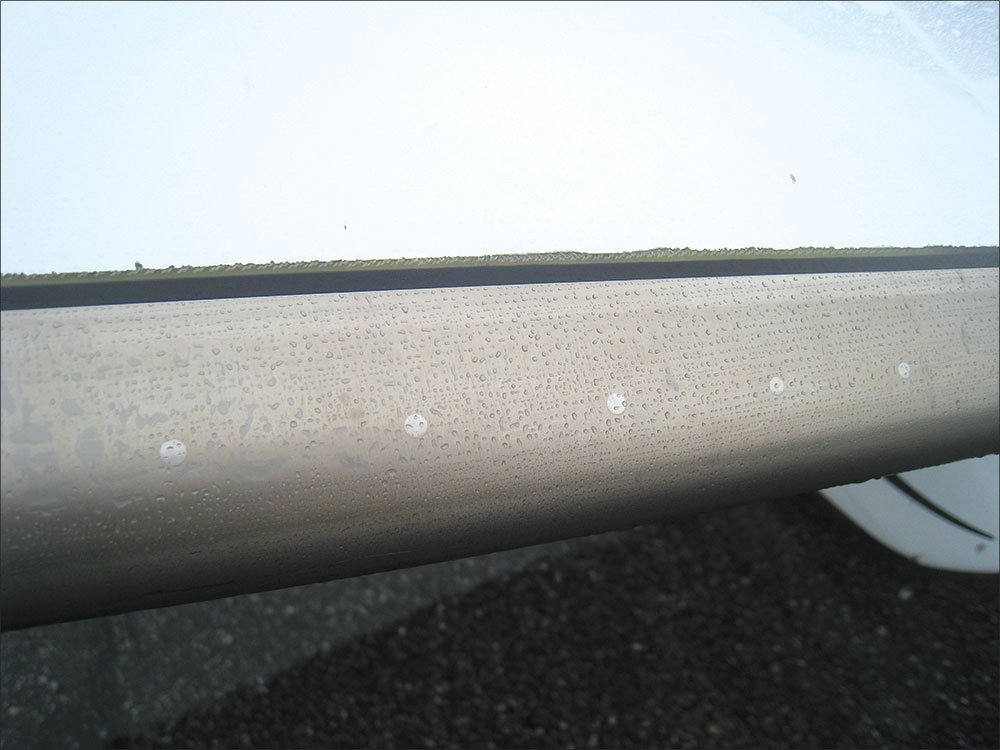
Cirrus expert and instructor Luke Lyson of The Flight Academy (www.theflightacademy.com) points out that the best defense is a good offense: Run the system once a month to keep the panels moist and make sure all panels weep fluid on preflight before a flight where you might need TKS. “Sometimes they tell you they haven’t used it all summer,” he says, “It can take 20 minutes instead of five to get fluid everywhere. There ends up being a pool of it under one wing before it comes out on the other.” If the panel dries out, no amount of running the system may work. There is a shop technique involving pouring hot water over the wing; but if that doesn’t work, the fix involves pumping large amounts of money into the wing at high pressure. Wasting a little fluid each month is a better deal.
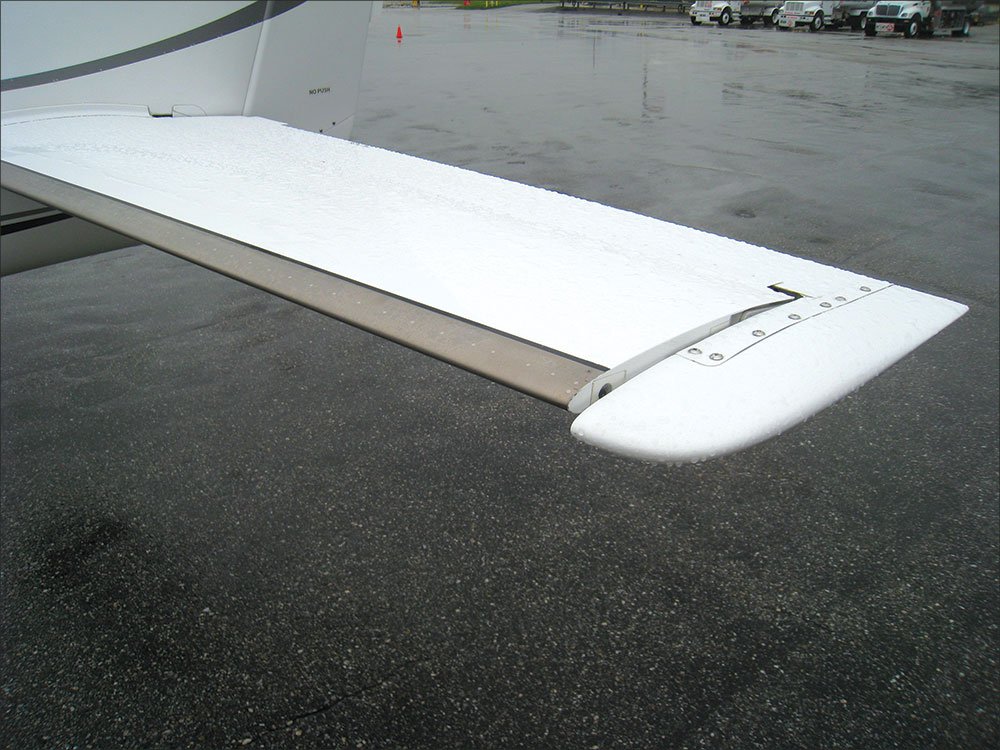
It can be difficult to tell if the system is working when testing in heavy rain, but you should see neat lines of droplets on the leading edges and drips from the prop. How much fluid to maintain is up to you, but for systems that don’t have a gauge, the only way to ensure it’s full may be to fill until it’s spilling out. Also be aware that you may need to tanker extra fluid on a long trip, as it’s not for sale everywhere. Even if it is, you might be shocked what the FBO charges to part with it.
Failure of a wing or tail panel in the air is a serious situation, as you have few options for stopping ice accretion in that area. The best bet is to get out of the ice ASAP. If it’s a tail section and you have a windshield sprayer, you might try hitting it, as it blasts much of the fuselage and some of the tail. Even spray from the prop can throw some fluid on the windshield and the tail. Kicking up to max flow could help, but it will cut the total time you can stay in the ice.
Failure of prop fluid is similar to hot prop failures: Vary the engine RPM if you can and get out of the ice. —Jeff Van West
Lee Smith flies a corporate Cessna 421 and prefers shedding ice from his glass after the flight.