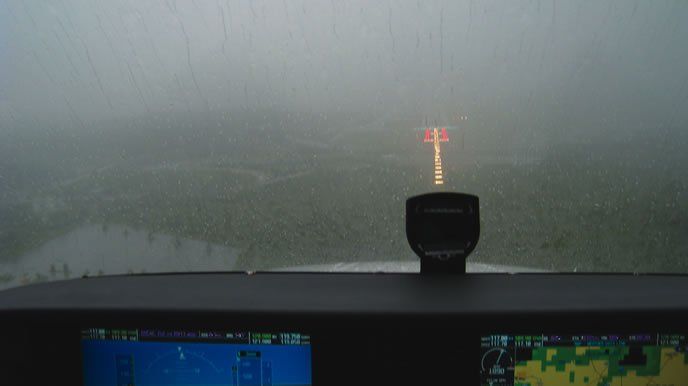
You’re descending on the glideslope for the ILS 29 with a 25-knot tailwind. Winds at the surface are eight knots from the southwest. Quick: What two corrective actions will you need to make over the next three minutes?
With enough experience you’ll get it right, but ask yourself: Is this brand of analysis second nature to you? Sure, you can just follow the needles and correct, but that’s accepting being behind the curve rather than mastering it. An understanding of the variables affecting an approach path give you the capacity for proactive, rather than reactive, piloting.
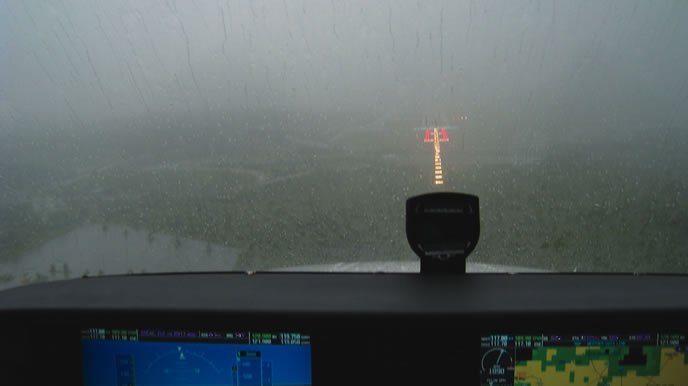
Picture the Path
Think about the drab graphics of an ILS you once saw in an old instrument-flying textbook. Left and right guidance was likely depicted in a wedge-shaped pizza slice, with its apex at the runway. The glideslope was like a department store escalator bound for housewares, sporting goods and the touchdown zone.
Let’s refine that mental image. The localizer signal projects from an antenna located off the far end of the landing runway. Its signal blankets the entire runway and its wedge is tailored by the engineers to a width of 700 feet at the landing threshold. In other words, full-scale CDI deflection will occur when the airplane is either 350 feet left or right of center at brick one of the ILS-equipped runway.
Picture how the wedge on a 5000-foot runway differs from one imposed on a 12,000-foot runway. The shorter runway results in a wider pie slice and the longer one is much more narrow. In rough numbers, at six miles from landing, the full-scale width of the wide slice is 5000 feet, while at the same point, the more narrow course is only 2700 feet wide. It’s not as if you have a sensitivity switch on your instrument panel—the needle will simply traverse the case more quickly on a longer runway.
The glideslope antenna sits abeam the touchdown zone and projects its signal upward and outward to a minimum of 10 miles. Although the published angle may vary from 2.5 to 3.0 degrees, unlike the localizer example, the signal it broadcasts is the same regardless of runway length. One can imagine the localizer and glideslope signals combine to create a funnel of sorts; the exact center of both could be pictured as a single piece of string stretched from glideslope intercept to the touchdown zone.
Flying on a clear day, you might conduct an entire visual approach, rarely looking at the panel with the touchdown zone stuck behind a bug smear on the windscreen. I bet that if you tuned in the ILS halfway down this visual approach, the needles would likely indicate near center. My point is this: Even when you’re flying the ILS deep in the soup, shift your thinking to envision flying the airplane down the approach path with the needles serving to confirm that your actions are keeping you on target, rather than waiting to react to their deflection.
Heading and Rate
Two things allow a pilot to accomplish a visual straight-in, or an ILS/LPV for that matter: heading and descent rate. On a no-wind day, magnetic heading matches the magnetic azimuth of the runway. Wind will necessitate correction.
My early CFI, Chase Needles, taught me the wind face of the E6B. The amount of correction depended on my airspeed, the wind speed, and the angle of wind to my course line. A pure headwind or tailwind required no crab adjustment.
Here’s the rub. Airspeed may change along the approach due to procedural reasons, such as flap speeds or gear extension. Of course, the winds normally change from altitude to the surface as well. The result is the pilot constantly monitoring and updating what’s called the “reference heading” throughout the maneuver. The trick is picturing that E6B and making an educated guess as to the first heading to fly. Watch the needles for a trend. It will be converging, diverging, or paralleling. Make finite corrections and see if the trend improves. Fine tune them until a reference heading is found.
Remember the width of the course and where you are along it. Ten-degree bites early on may shrink to five or fewer degrees of change as the funnel narrows; bear in mind when flying to a long runway that the funnel is already somewhat narrow. At a graduate level, you may find greater heading changes more useful when turning into the wind and vice versa. Faster aircraft beg for smaller adjustments because they cross the distance quicker. The good news is that a faster machine is less affected by a given wind.
Fast forward to 2010 and GPS navigators with track (TRK). If flying to a runway with an azimuth of 290 degrees with a south wind that requires a 10-degree-left correction, your heading will be 280 but the TRK will still show 290; maintaining this track will fly you to the runway as if on train tracks. If TRK were to slip to 295, note your indicated heading and turn five degrees left. This is your new reference heading and track should again indicate 290. This all assumes you’re still on centerline. The GPS takes the art of wind correction and makes it all science regardless of the airplane you fly or the strength of the wind. The art in piloting remains in always maintaining a reference heading with precise wings level and in not chasing the GPS screen or the CDI needles.
Slope not Slop
The second dimension to be mastered is glidepath. Boil this down to one factor: groundspeed. Yes, airspeed changes, indicated or true, and wind changes all affect glidepath, but the collective result of all these influences is seen in groundspeed.
Ever looked at a required-rate-of-descent table in the back of your pubs? Matching an angle with a groundspeed yields the one descent rate necessary to match the slope. As we’ve detailed before, there is an easy way to estimate this on a standard three-degree approach: Half your groundspeed and add a zero. For example, at 90 knots, half is 45, and adding a zero makes it 450 feet per minute. (The book answer is 478 FPM.)
Is there an easy way to transition an aircraft from level flight to a selected descent rate? Assuming you’re stable at approach speed in level flight, decrease indicated pitch three degrees. Vertical speed should settle close to the desired value. Just as a reference heading was used laterally, note the exact pitch that yields the desired descent rate and make this the reference pitch. Focus on the attitude indicator and estimate the value of one degree to avoid overcontrolling subsequent corrections. Once a reference pitch is nailed, you can cross-check the glideslope needle for trends to emerge.
Just as TRK helps fine-tune heading corrections, groundspeed and indicated vertical speed (VSI) will show the way vertically. In other words, if GS is initially 90, then 450 VSI is required. If you’re high as a result of being late starting down, 450 VSI will never capture the path. You’ll only parallel it. What’s worse in the cockpit is that the narrowing nature of the glideslope will cause the CDI to show an ever greater deviation if no correction is made, because the limits that give full needle deflection are tighter as the approach progresses.
To fix this predicament, set 550 or 600 VSI and watch for the slope to trend towards center. Anticipate it reaching center and make a distinct correction of pitch to resume 450 VSI. As your experience develops, expand your cross-check for groundspeed changes to ensure that 450 remains the proper target. Recognize that the use of a reference pitch and incremental corrections is very similar to what you’re doing to track the localizer, only turned on its side.
The Take Away
Approaches are rarely flown with just a change or two. Rather, the airplane is piloted precisely by a continuous monitoring of changes in track and groundspeed (using what avionics you have and needle motion) spurring small, measured adjustments in both reference heading and pitch. These corrections prevent the needles from ever wandering far from center to begin with.
The opening asked which two corrections you could anticipate making on a given approach. In short, a 25-knot tailwind was likely to vanish and a crosswind component was going to materialize from the left. Given all we’ve covered, I’d hope that you’d answer, “I will anticipate decreasing descent rate as groundspeed falls off and I will expect my reference heading to migrate to the left to compensate for a wind shift.”
This type of proactive piloting takes detective work: attention to detail and the study of clues. Success is like being in position to pounce when the crook walks through the door, rather than being the rookie who shows up late to find a trail gone cold.
Ken Holston is an ATP, CFII and IFR Contributing Editor.
