Aircraft performance parameters are typically expressed as measurements of speed (indicated and true), altitude and vertical speed. Often overlooked is angle as an expression of performance. Angles are a terrific tool for estimating glide and approach performance, avoiding clouds and storms and avoiding obstacles and terrain on takeoff.
There are two related subjects: how to measure angles while in flight, and how measured angles can solve in-flight problems. Let’s start with measurement.
Getting the Right Angle
We do well when estimating large angles like 90 degrees and 45 degrees, but less well judging something like 30 degrees. We’re really poor at estimating one to 15 degrees, yet these are the angles that are most useful.
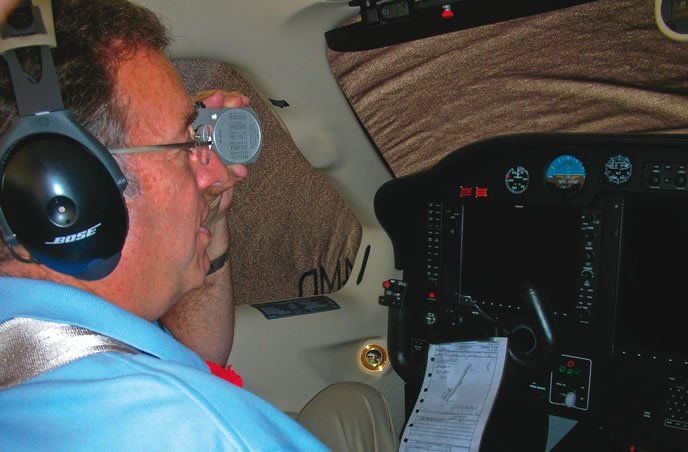
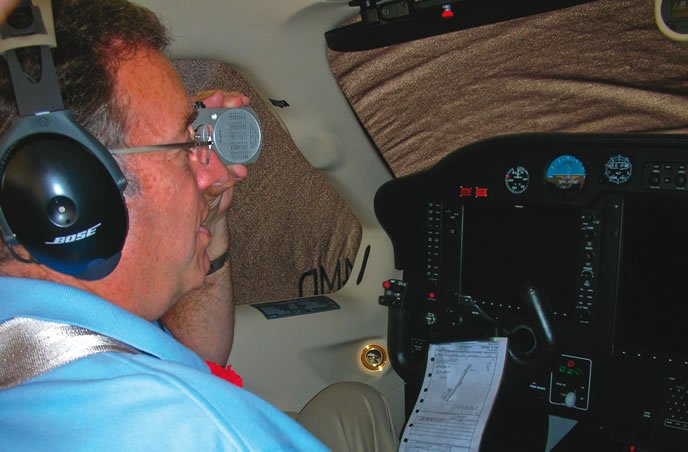
Two devices are helpful in this regard. Vertical angles—up and down—can be measured with a clinometer that references gravity. Clinometers are commonly used in surveying and you can get them from forestry equipment outfitters, surveying companies and even on Amazon (though not the best prices). I have tried several brands and found Suunto clinometers work best in the cockpit. I can accurately sight angles in one-degree increments. Suunto clinometers currently cost about $130.
If you are unwilling to spring for the cost of a handheld clinometer, there is another option if you own an iPhone: Several inexpensive apps turn your phone into an accurate clinometer. I suggest the $0.99 “Clinometer: Level and Slope Finder” from the iTunes Store. You can hold the iPhone on edge, sight along the long edge, push the hold button, and then read off the angle. It is not as convenient as a standard clinometer, but it works and it’s hard to complain about the price.
Horizontal (azimuth) angles can be measured by compass. While most aircraft have at least two compasses, a gyrocompass and a magnetic compass, they are fixed to the aircraft and not helpful measuring angles without making s-turns. A handheld sighting compass, perhaps one left from Scouting or hiking, is a better choice. Again, several types are sold by outdoors or forestry outfitters. I use a Suunto Tandem—a combination bearing compass and clinometer—but good sighting compasses are also manufactured by Silva and Brunton.
Know Your Glide Angle
One of the best angles to know when you only have one engine is your engine-out glide angle. Since manufactures rarely publish this angle, you may need to calculate it. That’s actually easy to do.
As we are considering small angles, the 60 to one rule applies: a one-degree, right (or equilateral) triangle has a long leg of 60 units and a short leg of one unit. As there are slightly more than 6000 feet in a nautical mile, it follows that a one-degree triangle with 6000 feet along its base is 100 feet high. Or, in most useful form: One degree is equivalent to 100 feet per nautical mile. As we are dealing with small angles, there is little error in this assumption. So your glide angle equals your glide distance from the POH in hundreds of feet divided by nautical miles. If your plane’s maximum glide range in clean configuration is 25 nautical miles from 10,000 feet to sea level, the glide angle is 100/25 = four degrees.
This gives you a no-wind cone around your aircraft of where you can reach in a glide. Measure it in flight with your clinometer and you’ll always have a rough sense of what’s realistically within gliding distance.
Some aircraft glide with the nose above the angle of the glide and cannot reach any point seen over the nose (assuming the absence of a strong tailwind). This usually means you need to look for a forced landing site to your left. Anything you can see forward or to your right (assuming side-by-side cockpit seating) cannot be reached.
A four-degree glide would also preclude gliding down an ILS glideslope. But the angle helps you adjust: You need at least 100 feet (one degree) higher than the glide slope for each nautical mile from the touchdown point. This also applies to flying an engine-out traffic pattern. You can start to develop systems for your airplane.
The glide angle is substantially worse when you lower flaps and landing gear. You could estimate it by trying an engine-idle glide at the recommended glide speed, noting the vertical speed, lowering the flaps and gear and noting the new vertical speed once things stabilize. The ratio of the two vertical speeds is a reasonable estimate of the new glide angle. If the “dirty” vertical speed is twice that of the clean glide angle, then a four-degree glide steepens to an eight-degree one. There are other obvious factors like airspeed, weight and wind but the point is that the glide angle substantially increases. If there is a question about putting down gear and flaps, remember it’s better to land on concrete gear up than short of the runway with gear down.
Takeoffs, Turns and Clouds
Takeoff climb performance should also be converted. Referring to the POH, you should be able to express Vx and Vy climb rates as ascent angles. If your aircraft climbs at 90 knots and 600 FPM, that would be 1.5 miles per 600 feet. That pencils out to a four-degree path.
You should derive angles for Vx and Vy for various scenarios, say sea level and 5000 feet, both at ISA and, perhaps, ISA+20. Of course wind can affect this significantly, but you will still get a baseline from which to work.
At a particular airport calculate the ascending angle with attention to airport altitude and temperature. Then walk up the side of the runway to where you expect to lift off and take clinometer sightings of the surrounding terrain. If there is a question about terrain, though planning to fly Vx, assume the more restrictive Vy angle as a safety factor in avoiding terrain.
I have taken sightings adjacent to runways in mountainous areas and been surprised at the steep angle needed to remain clear. Planning to turn shortly after takeoff to avoid rising terrain you can’t clear is much better than being forced to turn blindly as trees start filling your windscreen.
Coming down to an airport, you can use a similar trick to estimate when to begin a casual and ear-friendly three- or four-degree descent for unpressurized aircraft.
You can also use the technique laterally to get in a good position for a base entry to a runway. Suppose you want to turn final half a mile from the threshold of a 5000-foot runway and you’re 10 miles from the airport. You need to get to a point about 6000 feet from the airport center. That’s 60 (hundreds of feet) divided by 10 miles away. You need to turn six degrees. A handy rule to remember is that 100 feet at one mile is one degree, 1000 feet at 10 miles is also one degree. Sometimes the mental math is easier with that ratio. The same math can be handy when asking for a deviation from a storm that’s at a known distance, as might be shown on a portable GPS with weather.
A clinometer can be used to judge if a cloud can be topped. This is useful when flying VFR on top, or VFR over the top. Icing or turbulence may be avoided by remaining in VMC. Wind clearly influences climb angle, but it is reasonable to assume clouds are equally affected, which cancels out the wind effect. You will however have to calculate your climb angles at altitude. The technique is the same as we’ve already discussed and the data should be in your POH.
If you fly a plane with an autopilot capable of maintaining a specific descent angle, a clinometer can assess cloud bottom clearance and you can put that into your computer for descent. You can also judge the angle needed and just pitch down that amount and adjust power to maintain your speed. You’ll fly that angle and clear the bases.
Just a Starting Point
All of these calculations are rough work that will need adjustment each time you employ them. The point is that you’ll be adjusting from a good starting point rather than a wild guess. This means you can make more informed decisions as you plan and fly. Practice improves your ability over time as well. If you have fancy avionics, it can make everything easier, but you still need to understand the basics to get it to work out right.
And when it does work out right, you feel like a master of the sky.
